|
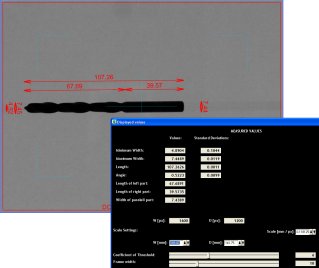
The inspection system captures image of each drill or mill tool and
also reads its weight. Geometrical dimensions of the particular tool
are then measured from the image. Then it is possible to calculate
material type and also the area of coated parts of the tool from the
dimensions and weight. Each tool is identified and characteristic
dimensions are checked.
The first precondition for achieving of high precision is capturing
of high-quality, high-resolution image, not distorted by noise or
lossy compression. This particular system uses 2 MPx DataCam
DC 2000 digital USB camera, which fulfills all requirements with
wide margins.
Then it is necessary to eliminate all lens aberrations and radial
image distortions, distortions caused by perspective projections and
lighting effects. Precise, but huge and expensive telecentric lens
significantly rises the application cost. This particular application
employs rather common Fujinon lens with C- mount. All image
distortions caused by lens and perspective projections are eliminated
with sub-pixel precision using image processing components of the
Control Web software. All these processing results
into absolute precision and reproducibility around 0.03 mm. Tools
can be measured with similar precision anywhere within the camera
field of view.
Thanks to Control Web rapid application
development system this application can be easily integrated into any
enterprise information system. Control Web
application is also easily maintainable and extensible.

Standard deviations of multiple acquired
dimensions The whole application demonstrates the capabilities of the DataCam
cameras integrated with Control Web image processing
components to create high-quality solutions with very affordable
prices.
rc
| 